Using Blender for concept art seems already promising for many 3D artists out there. Today we are going to be looking at a really interesting Blender addon for concept art called Simply Concept. It has been introduced by the creator of “simply micro-mesh” and “simply cloth pro” addons.
Of course, we have covered these two before when we last talked about cloth simulation addons that you can use with Blender 3D. Today however, it’s another addon that is definitely not any less awesome than its predecessors.
Why use a Blender addon for concept art?
Simply concept is a tool that will allow you to create 3D concept art quicker and easier in Blender. Using basic shapes, you can block out your model quickly and easily.
What the tool does is voxelizing your geometry and merging the whole thing together in real-time. It offers basic shapes and Boolean operations. Combining them together, the result is a stunning and simple concept model workflow.
How to get started with the Simply Concept Blender addon?
After installing the “Simply concept” addon, go ahead and select it. You can see the addon panel on the left, you can then go ahead and click the big ( Simply Concept it! ) button at the top. Now you can see more parameters appear underneath, but more importantly, your mesh is voxelized.
You can think of voxels like pixels, but in the 3D space. So in other words, your mesh is made of multiple smaller cubes, and the best way to visualize it is to think of games like Minecraft or lego games.
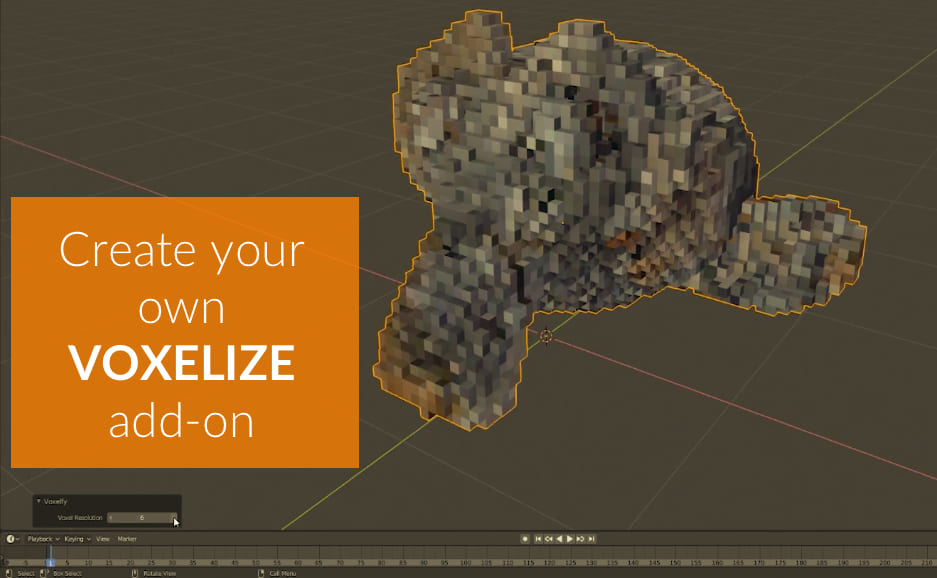
Of course, you can use any model to do this, and you can edit your shapes in real-time without having to apply the addon every time. However, the first shape is always going to be the base of your whole concept mesh/model.
From the moment you press the (Simply concept it!) button till you press ( Finish Concept ) button, you cannot add more shapes. In other words, using Blender (shift+A) add shapes will not be possible. Well, you can, but the addon will not take it into account while applying the “simply concept” addon.
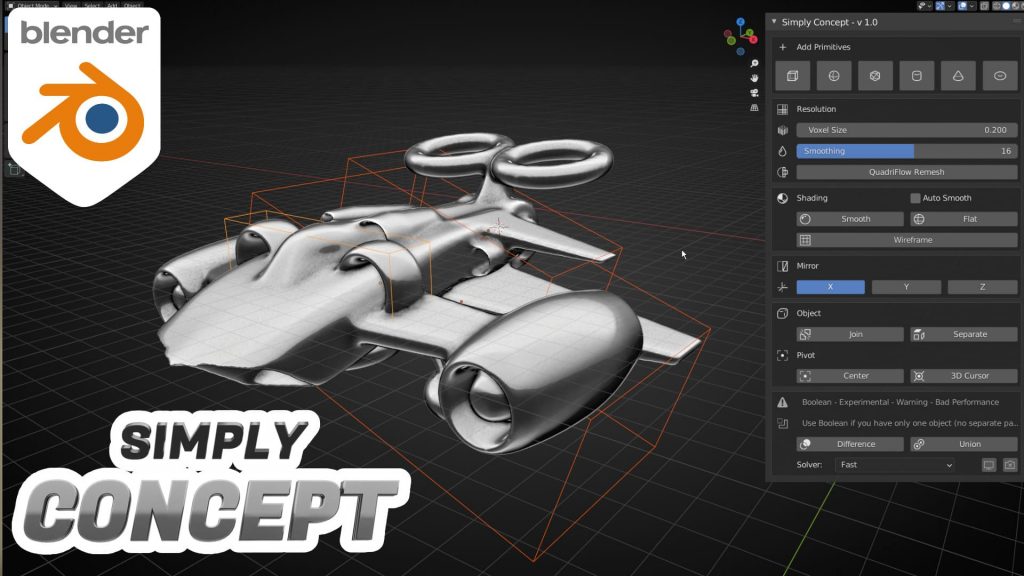
What you have is a row of primitive shapes that are provided by the addon. You can use them to create your concept, you have: cube, sphere, ecosphere, cylinder, cone, and torus.
You can go ahead and add another mesh to the scene from the list. Now, if you move it around you can see that the two shapes will bleed into each other. To be more specific, they look like they’re been merged together.
Actually, that’s exactly what the addon does: it saves you the headache of keeping track of the topology. Instead of that, it just gives you the freedom to smoosh everything together. The best way you can think of it is like play-dough material.
Simply concept addon settings
Now that we understand what the addon is all about, let’s look at some of the settings it provides:
1. Resolution section
In the resolution section, you have:
- “Voxel Size”: controls the size of your voxel. It’s better to keep this value above 0.03, anything less than that and you’ll see some dips in performance. At 0.01, the effect is not even noticeable (that’s because your voxels are way too small).
- “Smoothing”: this value controls the “ Repeat “ parameter of the smooth modifier. This will round up the sharp edges of your model, and the higher you go the smoother your shape will be.
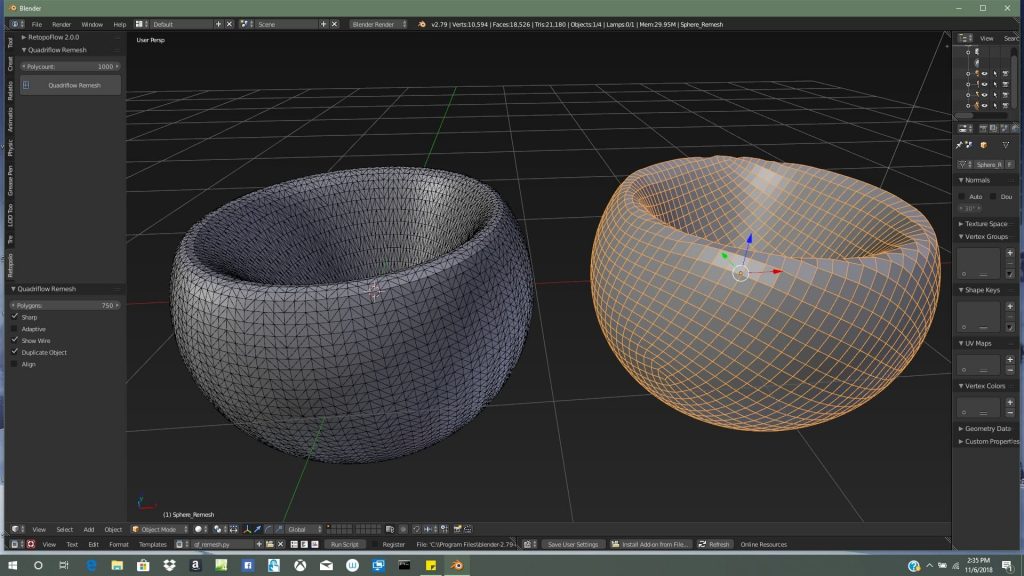
- “QuadriFlow Remesh”: sounds scary, but it’s so simple: you can think of it as a more sophisticated Remesh modifier. It’s been introduced since Blender 2.81, and you can find it by default in Blender on the “data properties panel” under the “Remesh tab”. Just select “quad” instead of “voxel” (which is selected by default).
2. Shading section
Next in the shading section, you can control your normals orientation. You have smooth, flat shading and a check box for auto smooth. Underneath you have a button labeled “wireframe”: clicking it will overlay the model with the wireframe topology. Finally, you have an opacity slider next to it to control the line’s intensity/visibility.
3. Object section
The next section is “object”. You have two buttons: “join” and “separate”. The join button will merge two or more objects together. The separate button will separate the object selected from the addon calculation, turning it into a normal object.
4. Pivot set
The next one is “pivot”. It sets the selected object to either “center“ (which is the center of the object) or “3D Cursor”, and that is of course whatever your 3D cursor is positioned in the scene.
There’s one more interesting thing: if you add another object from the list (say like a cube for example), as long as you’re selecting an object other than the root object, you get another section called “Mirror”. As the name suggests, a mirror modifier gives you the option to mirror selected object on (x,y,z) Axis. However (and this is important to note here), the mirror modifier will ignore the pivot point of the object been mirrored. Instead of that, it will use the base object pivot point.
5. Boolean section
Lastly, you have the boolean section: You can see the big warning sign on this section because it’s very laggy and will hinder your performance. The developer put up a warning that reads “experimental – warning – bad performance“ use boolean if you have only one object ( no separate parts ).
This is literally just a boolean modifier with fewer parameters. You have two modes:
- “onion” which will combine the meshes in an additive way.
- “difference” which will combine the meshes in a subtractive way.
My advice is if you have to use the boolean operation but you don’t want your performance to suffer, all you have to do is apply the boolean operation. After that, disable the “real-time viewport display” at the bottom. This will not affect the performance and at the end, you can re-enable it to finish your concept.
After you finish your work, all that is left now is to hit the “Finish Concept” button and the addon will merge all the objects permanently this time. But you still have your “QuadriFlow Remesh” button, if you want a lower vertex count you click and choose a vertex count you like… and voila you have your concept art ready.
Conclusion
This is a very useful Blender addon for concept art, especially for concept artists or 2D game developers that are going for a more simplistic design. I can definitely see it has been used more and more by Blender 3D artists to create concepts for their work. Simply concept reminds me of the rough sketch before the final drawing: it gives you so much freedom to play with the shapes in a non-destructive manner.
You can get the addon here: https://blendermarket.com/products/simply-concept?ref=247
If you want all 3 addons there is a bundle pack that contains all 3 addons, Simply cloth, Simply mesh, and Simply concept. You can find the bundle here: https://blendermarket.com/products/simply-addons-bundle?ref=247

