3D Animation software are not created for animation only because they have other important functions that can be used. Also to create an animation you need to learn how to create characters, environments, effects and so on.
We are going to take a general look at How To Use 3D Animation Software from start to finish. There are 8 major steps that we need to go through to create an animated movie.
1- Modeling

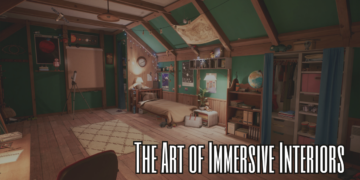
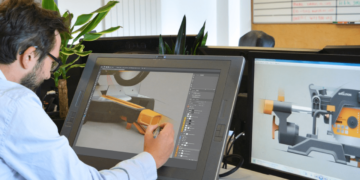
The first thing we need to do is to create the world in which the action will take place, this includes characters & environments. Modeling characters differs from modeling environments in many ways and both disciplines take different skills and experience, usually in animation and game development studios. There is a character Artist and an environment artist because Modeling usually is the most time-consuming process since it is the bridge between the 2D concepts & illustrations and 3D, so all the steps that come later will depend on the modeling process.
Usually, 3D Softwares come equipped with tools that will make this process faster and easier depending on how familiar you are with the software. You can use basic geometry to kick off the process then you start to modify the position of vertices, edges, and polygons in the 3D space.
Over the years the process of modeling is becoming easier and faster with the new tools and technologies that are developed to make it faster and efficient.
2-Sculpting

Sculpting is the process in which a 3D artist will add details that can’t be added in a standard 3D application like Maya or 3Ds Max because they don’t have the ability to sculpt with few exceptions like Blender, which has competitive sculpting abilities.
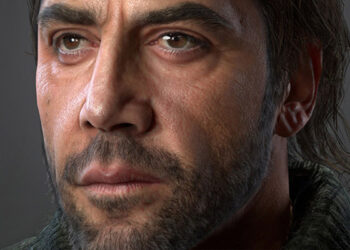
Usually, a character artist will bring the model from a standard 3d application and start adding wrinkles pores scars and all the imperfections necessary to take it to the next level of detail.
The best sculpting software is by far Zbrush from Pixologic, but there is also other sculpting software that can do a good job too. but Zbrush is the king of sculpting.
In the process, a 3D artist will subdivide the model to millions of polygons to have a greater control on how the surface is shaped, and the interesting thing about 3D sculpting is that it very similar to what a real-life sculptor does the only difference is the tools and Ctrl+Z which refers to the ability to go back and fix a mistake which does not possible in real life sculpting.
3- Retopology

Retopology is necessary for making the sculpted 3D model less polygon dense for practical reasons will effect the next steps down the line.
Basically retopology is taking the 3D model from having millions of polygons to few thousands depending on how complex it needs to be.
This process can take place in a standard 3D application like Maya, 3ds Max or blender and also it can be done using a third-party application like Topogun which makes the process easier and faster.
4- Uv Unwrapping

UV Mapping or UV unwrapping is the process of turning the surface of a 3DModel or character into a 2D flat surface that can be used for generating maps and textures later.
This process is harder when it comes to characters & you need to be good at it because character skin and clothes are going to be moving a lot and this might cause some technical problems that will be dealt with later in rigging and animation.
5- Texturing

Texturing, or what is also called as surfacing, is the process of painting the surfaces of objects and characters using specialized software like Substance painter, Mari or pixel suit.
In this part of the production objects and characters come to life when a texturing artist adds textures and materials. This process used to be completely manual and a lot harder and time-consuming than it is today.
Using the software I mentioned before took texturing to the next level and made it faster and more accurate because they are procedural and they have presets and ready materials and masks that do the heavy lifting for the artist which allows for more creativity and a higher level of detail and complexity.
6- Rigging

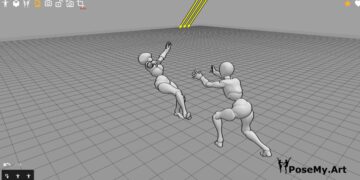
Rigging is a technique used in skeletal animation for representing a 3D character model using a series of interconnected digital bones. Specifically, rigging refers to the process of creating the bone structure of a 3D model.
This bone structure is used to manipulate the 3D model like a puppet for animation. Pretty much anything can be rigged. A space ship, a soldier, a flower, an animal, it doesn’t make any difference what the object is. Adding bones will allow any object to be animated freely.
Rigging is most common in animated characters for games and movies. This technique simplifies the animation process and improves production efficiency. Once rigged with skeletal bones, any 3D object can be controlled and distorted as needed.
In the entertainment industry rigging is a major step in the standard way of animating characters. Achieving smooth and complex animations is entirely dependent on the quality of the rigging phase in the animation pipeline.
7- Animation

Animation is always done after rigging has been completed.
Engine physics will use the rig if you animate a specific point, the rest of the structure will follow so that you’re not animating just a single vert.
There are many techniques of animation that animators will use depending on the results they want to get or the type of animation they need.
There is Keyframe animation, Driven key animation, Nonlinear animation Path animation and motion capture which is basically capturing the data from real actors suits and tweaking in the computer to get a better result.
8- Lighting

Lighting is a determining factor because it can make the previous work you did look better and sometimes if the lighting is poorly executed it will make the scene look bad.
Lighting is very complicated and it will take a physicist to explain what is going on when we use a light in the 3d environment.
Basically the goals of lighting in 3D computer graphics are more or less the same as those of real-world lighting. Lighting serves a basic function of bringing out or pushing back the shapes of objects visible from the camera’s view.
It gives a two-dimensional image on the monitor an illusion of the third dimension-depth But it does not just stop there.
There are different types of lights for different types of environments and different scenes, also interior lighting differs from exterior lighting. Each light source can be broken down into 4 distinct components and analyzed accordingly.
- Intensity
- Direction
- Color
- Size
9- Visuall effects

visual effects or VFX are very powerful and can make the experience much richer and intense for the viewer. Usually, standard 3d applications like Maya and 3ds max are capable of generating effects but there are some specialized 3D software that can do the job even better.
Effects vary from water simulations, fire , wind , storms, destruction, explosion and even subtle things that the viewers don’t pay attention to like foot steps, finger prints, fog and so on.
Usually effects visual effects are done inside the standard 3D applications using third-party tools and plugins that can be integrated.
Finally, Get your 14 Free Days of Premium membership on skillshare. https://skillshare.eqcm.net/inspirati… Note: you can cancel any time.

